
Hi, I’m Sabrina from Sabby In Suburbia. It’s great to be here at Everyday Mom Ideas to share a new DIY project with you guys.
I’m a scientist that was thrown into the stay-a-home mom/homemaker roll kind of unexpectedly a few years back. This turned out to be one of my life’s greatest blessings, as I have thoroughly enjoyed everything that being at home has brought to my life. When I’m not running around with my two boys, I love fixing up our home on a budget, cooking the old fashioned way and pursuing my photography hobby. All of these things make it onto my blog, where I share my tips and tricks as I learn new things each week.
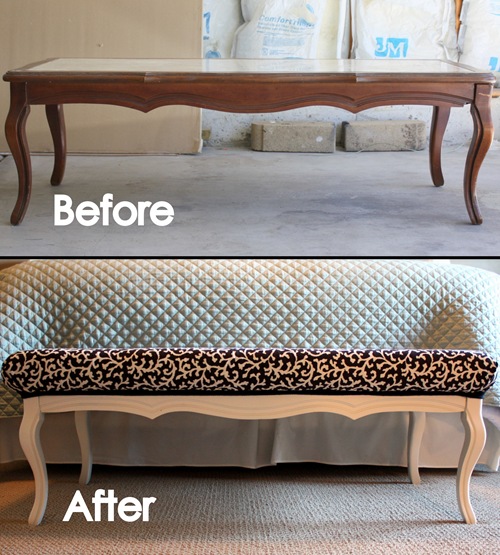
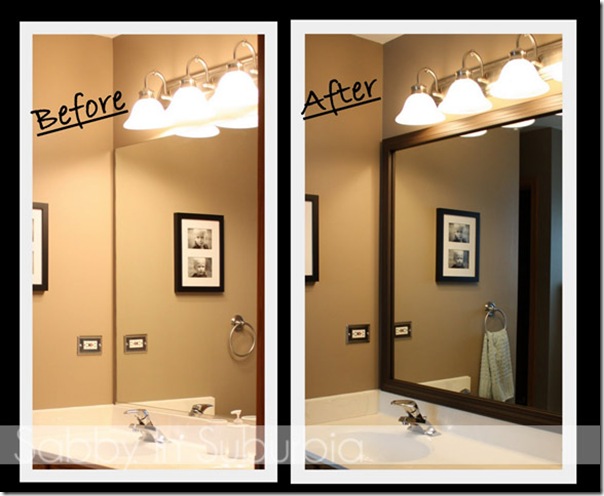
At Sabby In Suburbia, I tackle all kinds of projects and recipes. Here are some of my favorites:
![[IMG_95485.jpg]](http://lh3.ggpht.com/-OZhYfbLuhUU/UJaPE1P5QBI/AAAAAAAAIXo/h2ukxKSjMFg/s1600/IMG_95485.jpg)
Today, I’m sharing an inexpensive and easy to do art project that I completed last week. While tackling the laundry, I came across my “button jar”, my home for extra buttons. I’ve seen so many cute projects lately with button art and was inspired to make something myself.
To begin, I pulled out an old frame that I had in our storage area and removed the glass. FREE! Originally it was black, but I painted it a light grey color, leftover from sample that I bought for my son’s room redo. FREE!

This letter “P” was also found in my basement from a project gone wrong a few years ago.

I think it was from Hobby Lobby and maybe cost $2. This was painted grey from before so I just kept it that color.
Then, I began to sort through my buttons.

I decided to stay in a neutral palette since I didn’t have enough of my colorful buttons to make the piece look right.
Next, I arranged all of my buttons on the “P” to get the button colors distributed nicely. Once I was happy with that, I began gluing the buttons down using Tacky Glue.


One by one, until they were all in place.

Once I had all of the buttons in place, put the monogram on a flat surface to dry for a few hours.
While it was drying, I decided to add some textural interest to the frame. I wrapped the back of the frame in a cream cotton fabric that again, I found in my basement storage area. I promise you my basement is NOT code for Jo Ann Fabrics. I was truly trying to use up some of my crafting supplies.
To attach the fabric, I coated the back of the frame with Mod Podge and carefully smoothed out the fabric, using an old gift card to get rid of air bubbles.
After another hour, the fabric and monogram were both dry. To attach the “P” to the back of the fabric lined frame, I again used Tacky Glue. To be sure I got the monogram really glued down well, I placed a heavy book on top of it.

Sorry Martha!


A simple project using things I already had in my home. I love the way all the different buttons look together.

Since I’m a photography nut, its nice to have a piece of art with some texture.
Thanks to Everyday Mom Ideas for inviting me here today! Hope you all enjoyed this art on the cheap project and that you’ll stop by and visit me at Sabby In Suburbia soon!
You might also like


